Insurance - The Claims Process

This article is part of the Insurance section.
Find all related articles here:
Adding a New Claim
- Navigate to the Insurance tab.
- Use the filters at the bottom to search for your policy, select it from the grid and double click to open.
- Click on the Claim tab inside the policy.
- Click the Add button in the action bar on the left to open the Add Insurance Claim screen.
- On the Claim Details screen, enter information about the claim.
- Date of Loss - Select the date of the incident you are claiming for.
- Excess - This will auto-populate with the amount entered on your policy. You can edit this if required.
- Development - Select from the developments covered by this policy.
- Client or Apportionment - Select a client if you are making a private claim, or an apportionment for a common claim.
- Crime Reference - Enter your crime reference, if applicable.
- Description - Enter a description of the claim.
- Intimation Date - Select the date you are informing the insurance company of the claim.
- Peril Type - Choose from the dropdown. Peril types are configured under System - System Parameter - Insurance Peril Types.
- Contact Name & Contact Phone Number - This will be auto-populated if you have selected an individual client. If not, you can name a person for the company to contact when they are on-site.
- Development Sum Insured or Client Sum Insured - This will auto-populate with the Sum Insured from the development or the individual client.
- Client Address - This will auto-populate with the information held on the client account or development.
- Once you have entered all of the details, click Save in the action panel on the left.
- A pop-up will ask if you want to set a reminder. Click Yes to choose a date and time, or No to dismiss.
- A confirmation pop-up will provide you with a Claim Number. Click OK to dismiss.
- You will then be taken to the Estimates tab of the Add Insurance Claim screen.
- If you need to print or email the claim for your insurance company, return to the Claims tab and click Print Claim Notice or Email Claim Notice.
Estimates
Once you have added a claim, you will need to request quotes for the work from contractors and send these on to the insurance company.
- Follow the steps in Estimates - Creating and Sending Requests and Estimates - Recording a Quote Received.
- Do not accept any quotes until you have authorisation from your insurance company, unless you have delegated authority.
- Return to your insurance policy and open the Claim tab.
- Double-click on the claim you previously started, and open the Estimates tab inside the claim.
- Click the Add button in the action panel on the left. This will open the Add Insurance Claim Estimation window.
- Enter the details from your estimate. You can have the Estimates screen open in another window.
- Date - Select the date you received the estimate.
- Contractor - Select an existing contractor for the dropdown, or tick Use Other to add a new one. Adding a contractor here will not create a new Purchase Ledger account.
- Amount- Enter the amount they have quoted for the work.
- Description - Enter a description of the work to be undertaken.
- Estimate Upload - Click the ... icon to browse for the estimate document.
- Click Save and Close.
- Repeat the process for all estimates received.
- When you have entered details for all estimates, click Email Claim & Estimates to open the Claim Notice screen.
- Select which email address you want to send the estimates to. You can Cc in someone from your own company, if required.
- Edit the email Subject line, and Body of the email.

You can amend the default text of the body with the "Insurance Claims Email Body" System Setting.
- You can click the Add button on the Attachments row to add additional documents or images e.g. photographs of the damage.
- Click OK to send the email to the insurance company.
- A pop-up will confirm the email has been sent. Click OK to dismiss, and then close the email window.
Insurance Claim Authorisation
If you have delegated authority, you will be able to process claims up to a certain amount. If not, you will need to await authorisation from the insurance company before you proceed with the work your contractors have quoted for.
Your insurance company may give you instructions on which estimate to accept.
To record authorisation:
- Return to your insurance policy and open the Claim tab.
- Double-click on the claim you previously started, and open the Authorisation tab inside the claim.
- Enter the authorisation details.
- Date - Enter the date you received authorisation, or the date you are exercising delegated authority.
- Delegated Authority - Tick the box to indicate you have delegated authority.
- Claim Reference - Add a claim reference.
- Authorisation Upload - Attach the authorisation document from the insurance company, or confirmation of delegated authority.
- Claim Amount - Enter the amount the insurance policy is willing to pay out. This may not be the same amount you have claimed for.
- Click Save in the action panel on the left.
- If you want to send a letter to clients to confirm you have received authorisation, click Send Letter.
- This will open the Documents:Distribute screen with the recipients auto-populated from the claim. Follow the steps in Running a Mail Merge to complete the process.
Accepting the Estimate
Once you have received authorisation, you will need to go back to the Estimates module and accept the successful estimate.
To do this, follow the steps in Estimates - Accepting or Rejecting a Quote.
Creating a Work Order
After accepting an estimate, you are ready to instruct the successful contractor to complete the work.
- Return to your insurance policy and open the Claim tab.
- Double-click on the claim you previously started, and open the Work Orders tab inside the claim.
- Click Add in the left action panel to open the Jobs screen.
- Follow the steps in the Jobs Maintenance section to create, send and complete the work order.
Recording an Invoice
When you receive an invoice from the contractor, you will need to attach this to the insurance claim.
- Return to your insurance policy and open the Claim tab.
- Double-click on the claim you previously started, and open the Invoice Received tab inside the claim.
- Enter details of the invoice.
- Invoice Received Date - Enter the date you received the invoice.
- Description - This will be auto-populated with the description from the work order.
- Invoice Upload - Click the ... icon to browse for the invoice.
- Click Save in the action panel on the left.
- A pop-up will confirm that the invoice has been upload. Click OK to dismiss.
- If you want to email a copy to the insurance company, click Email Invoice in the action panel on the left. You must have an email address already set up on the policy to use this function.
Closing a Claim
Once you receive the payout from the insurance company, you can close the claim.
To do this:
- Return to your insurance policy and open the Claim tab.
- Double-click on the claim you previously started, and open the Claim Closed tab inside the claim.
- In the Posting Type dropdown, select one of the following options:
- Cheque Only - Select this if you have invoiced your clients and paid the contractor already, and you just want to post the cheque from the insurer.
- Invoice Only - Select this if you haven't received a cheque from the insurer, but you want to invoice your clients for the invoice from the contractor.
- Invoice & Cheque - Select this if you have received the cheque from the insurer and the invoice from the contractor, but you haven't invoiced your clients or paid the contractor.
- Close Claim without Invoice/Cheque - Select this if the insurer has taken over the claim and dealing with the contractor directly.
- Depending on which option you select, you will close the claim differently.
Cheque Only
If you receive a cheque, this will normally be for the amount they have agreed to pay, less the excess amount.
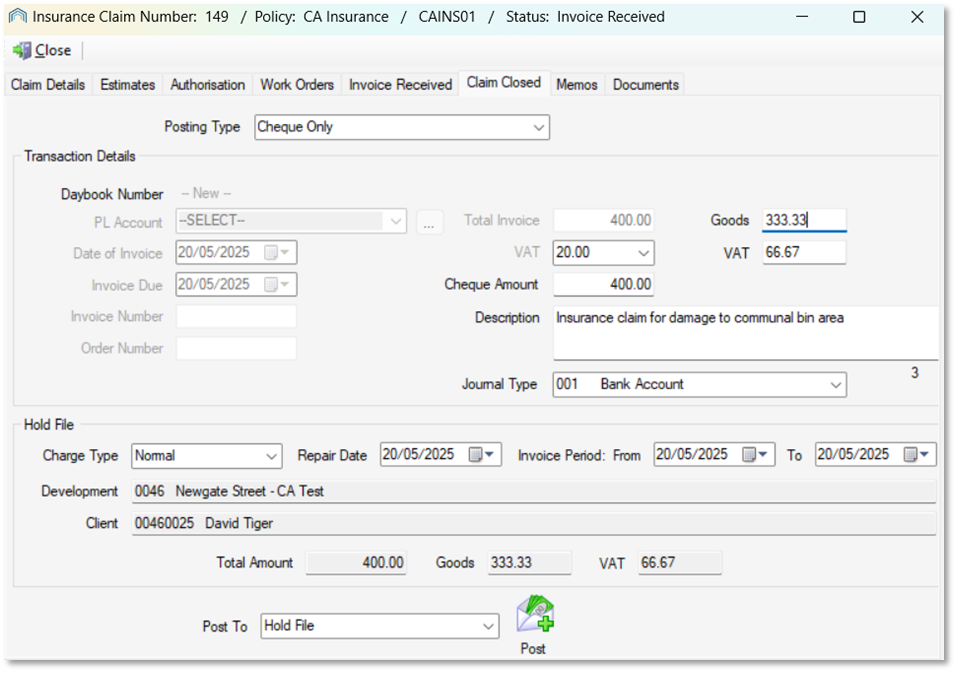
- Cheque Amount - Enter the amount on the cheque from the insurance company.
- Description - Enter an appropriate description e.g. "Insurance Claim for Storm Damage"
- Journal Type - Select where you are putting the cheque e.g. a bank account
- Post To - Select whether to post the credit to the Hold File or Charge File.
- Charge Type - Select a Charge Type from the dropdown.
- Repair Date & Invoice From/To - Select dates for your transaction.
- Click Post to credit the cheque amount against the client or apportionment selected when the claim was created.
Invoice Only
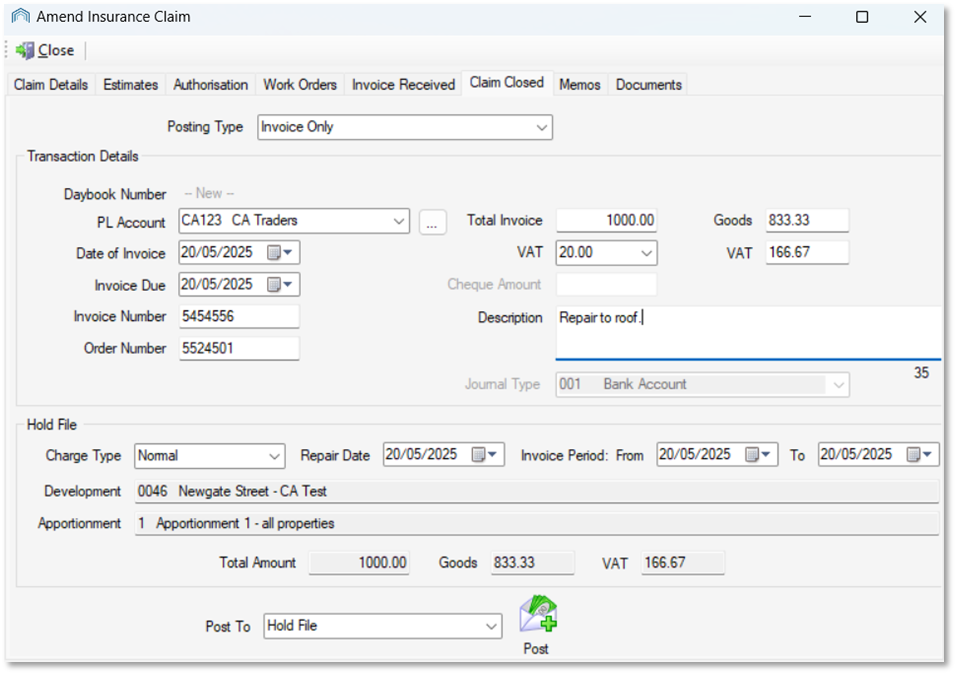
- PL Account - Select the contractor who completed and invoiced for the work.
- Total Invoice & VAT - Enter the total amount that has been invoiced, and the VAT rate. This will then calculate the Goods and VAT amounts.
- Date of Invoice & Invoice Due - Select the date of the invoice, and the date it is due to be paid.
- Invoice Number & Order Number - Enter the invoice number from the contractor and the work order number from the job.
- Post To - Select whether to post the credit to the Hold File or Charge File.
- Charge Type - Select a Charge Type from the dropdown.
- Repair Date & Invoice From/To - Select dates for your transaction.
- Click Post to charge out the invoice amount to the client or apportionment selected when the claim was created. This will also set the work order to EXC.
Invoice and Cheque
If you select this, you will be able to enter all of the information from the sections above.
When you click Post, it will charge out the invoice amount to the client or apportionment selected when the claim was created, and then offset this against the credit from the insurance company that is being credited to that same client or apportionment.
When you click Post, it will charge out the invoice amount to the client or apportionment selected when the claim was created, and then offset this against the credit from the insurance company that is being credited to that same client or apportionment.
Close Claim without Invoice/Cheque
If you select this, you do not need to enter any further information and you can click the Close Claim button at the bottom of the screen.
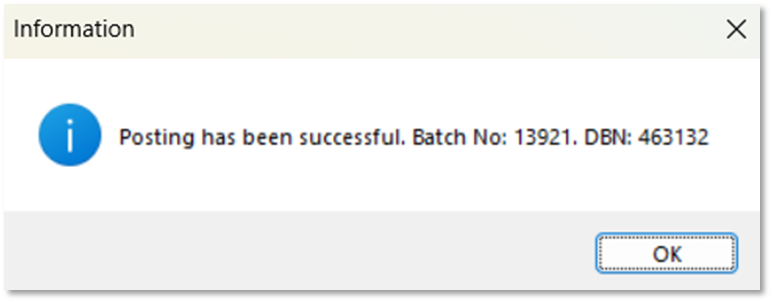
After closing the claim, a confirmation pop-up will provide you with a batch number. Click OK to dismiss.
If you return to the Claim tab on the policy, the Status will have updated to Claim Closed.
If you need to reinstate a claim you have closed, click the Unlock button in the top left corner.
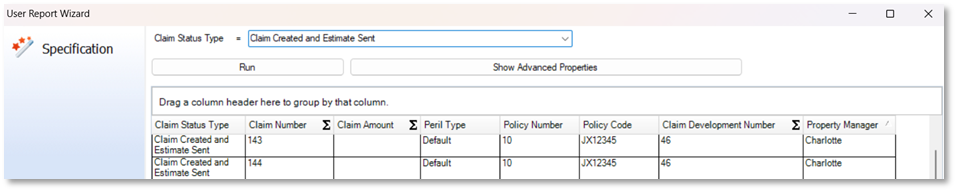
Reporting
You can keep track of open insurance claims on the Unresolved Insurance Claims dashboard card.

You can also set up your own report under Reports > New Report to allow you to monitor the progress of insurance claims.
Use:
- Category: Insurance
- Focus: Insurance Claims
For example, if you set up your Query Build to show claims with a Claim Status Type - Equal To - Lookup when run, you can then select an individual status to see all claims at that stage.

Related Articles
System Parameters - Creating Insurance Peril Types
This article is part of the System Parameters section. Find all related articles here: System Parameters Insurance Peril Types are used in the Insurance Claims process. See: Insurance - The Claims Process. It refers to the specific cause of loss or ...Estimates - Creating a Job from an Estimate
This article is part of the Estimates section. Find all related articles here: Estimates If you chose Job as the Type for your estimate, then when you accept a quote it will become a Job. You will be automatically taken to the Stage 1: Create Job ...Estimates - Accepting or Rejecting a Quote
This article is part of the Estimates section. Find all related articles here: Estimates Once you have received quotes from your contractors, you are ready to accept or reject them. Before you start, you will need to ensure that you have configured ...Insurance - Processing Insurance Adjustments
This article is part of the Insurance section. Find all related articles here: Insurance You may want to make changes to saved policies if there are mid-term adjustments such as a change in the sum insured after an updated valuation. To do this: ...Estimates - Creating and Sending Requests
This article is part of the Estimates section. Find all related articles here: Estimates This article will provide steps to create and send Estimate Requests to contractors. You may also refer to these as Quotes. Creating an Estimate Request Navigate ...