The Resource Centre

This article is part of the Resource Centre section.
The Resource Centre is a library where you can store resources that your team need to access.

Resources will be saved in the folder set in the "Resources Folder" System Setting. Contact Support for help with configuration.
Accessing the Resource Centre
To open the Resource Centre:
- Go to Tools and select Resource Centre from the dropdown menu.
From here, you can add and view resources if you have the Global - Tools Resource Centre permission.
Adding Resource Categories
Resources are organised by categories, and you can add new categories if required.
To do this:
- Go to System - System Parameters and select Resource Categories from the dropdown menu.
- Click the Add button on the Resource Centre Categories screen.
- Enter a Name and an optional Description for your Category, and click Save.
- A pop-up will confirm that the category has been added. Click OK to dismiss.
Adding Resources
You can upload files or add links to websites in the Resource Centre.
Adding a File
- Open the Resource Centre and click Add.
- Under Add/Amend Resource enter information about the resource you are adding.
- Resource Type - Select File from the dropdown.
- Resource Category - Select a category from the dropdown.
- Name (mandatory) & Description (optional) - Enter an appropriate name and description.
- Click the ... icon to browse for your file.
- Once the file is uploaded, click Save.
- A pop-up will confirm that the file has been added. Click OK to dismiss.
Adding a URL
- Open the Resource Centre and click Add.
- Under Add/Amend Resource enter information about the resource you are adding.
- Resource Type - Select URL from the dropdown.
- Resource Category - Select a category from the dropdown.
- Name (mandatory) & Description (optional) - Enter an appropriate name and description.
- Copy and paste the URL into the Resource field.
- Click Save.
- A pop-up will confirm that the URL has been added. Click OK to dismiss.
Viewing Resources
Once you have added files and/or URLs they will be visible in the Resource Centre.
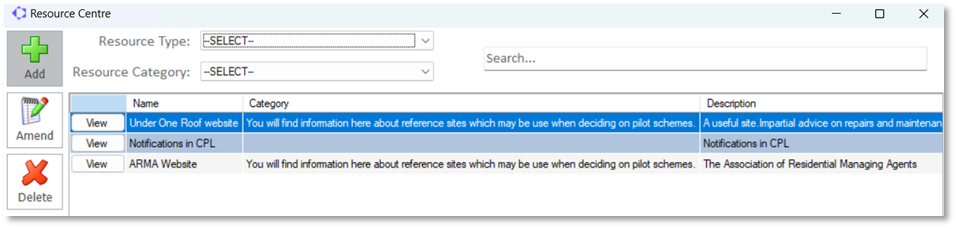
To find a resource, you can use the Search box or filter by Resource Type or Resource Category.
Once you have located your resource, click the View button. This will open files in a File Viewer window, or take you to the URL on your default web browser.
Highlight a resource in the grid and click Amend to make changes, or Delete to remove it.
Related Articles
Proptimo Release Notes
In the table below you will find links to access copies of Proptimo's Release Notes. Version Release Date Click to View Notes Proptimo Core 2.96 18th March 2026 Proptimo Inspector 1.11.22 18th March 2026 Customer Portal 3.3.52 18th March 2026 ...Reports - Running Reports and Creating User Reports
This article is part of the Reports section. Find all related articles here: Reports The system includes a variety of built-in reports to help you easily view and analyse information across different areas. You also have the flexibility to design ...FAQs
Frequently Asked Questions Below you will find a list of FAQs that will hopefully help you resolve any questions you may have. We will continue to add to this list. If you have anything you would like to suggest for inclusion here then please get in ...Credit Control Status Types - Configuration
This article is part of the Credit Control & Client Statuses section. Find all related articles here: Credit Control & Client Statuses Overview The credit control system in CPL is designed to allow you to manage your debt effectively and to recover ...Credit Control - Instalments
This article is part of the Credit Control & Client Statuses section. Find all related articles here: Credit Control & Client Statuses If you have come to an arrangement with a client for them to pay off a debt in a series of instalments, then you ...