Purchase Ledger Payments

This article is part of the Purchase Ledger section.
Find all related articles here:
Introduction
After you've received and entered an invoice for works or goods into the system, you can proceed with paying your PL accounts for these services.
There are several options for paying your contractors:
- Bulk Payments: Pay a contractor for all completed jobs (by BACS or cheque).
- Individual Payments: Pay a contractor for one or multiple jobs.
- Partial Payments: Pay part of an invoice (available when selecting the Manual payment type).
Payments are managed in the PL Payments screen. For unlinked invoices, they must first be added in the Purchase Ledger Transactions screen before being paid in PL Payments. These invoices won’t have a development assigned to them.
This article assumes that you have already processed the invoice through the Purchase Ledger Transactions screen and onto the the Hold/Charge or Transactions Files.
For guidance on entering invoice details into the system, please refer to these guides.
Use the "PL Wait On Hold Release" option to control whether contractor payments include unreleased Hold File charges. Contact Support to configure this.
Reports
In all reports described in this article, click the arrow in the left-hand margin to access the Print or Export options:
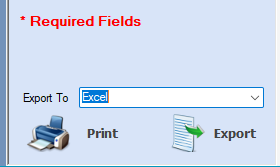
If exporting the report, select the format in the Export to drop-down:
Accessing PL Payments
To access the tool:
- Go to the main Purchase Ledger tab.
- Click on PL Payments in the action panel:
- The PL Payments screen is displayed:
This screen enables you to:
- View and print BACS, cheques and manual prelists.
- Process payments via BACS or cheques.
- Print and email PL remittances.
- Reprint PL BACS/cheques reports.
- Run a BACS export.
Selecting Payments
On the PL Payments screen, use the top fields to specify the contractor payments you want to make. Selections are not required for all fields, depending on your payment needs:
- Development PL Bank: Select the bank account from which payments will be made using the drop-down menu.
- To Date: Set the latest payment date using the calendar. It defaults to today, but you can select a different date.
- Development Range: To target specific developments, use the From Development and To Development fields. Leave these set to --SELECT-- to include all developments.
- Cashbook Reference: Enter a reference here if used by your company; otherwise, leave it blank.
- Payment Type: Choose how you want to make payments:
- BACS (Bankers Automated Clearing System) for electronic transfers.
- Cheques for physical cheques.
- If paying by cheque, input the starting cheque number when it appears.
- Manual for ad hoc or partial payments. This option lets you:
- Partially pay a single invoice or invoice share.
- Exclude (allocate off) two equal but opposite invoices.
- Overpay invoices. Overpayments can be useful for ensuring accounts are in credit ahead of Direct Debit payments, such as pre-emptively crediting a utility account before receiving an invoice.
- PL Account: Select a specific contractor account or leave it at --SELECT-- to include all. Use the binoculars icon to search for an account.
- PL Account Type: Select an account type or leave at --SELECT-- to cover all types.
After setting your preferences, click Get Payments to display matching transactions in the grid.
The system option "PL Payments Data Expiry Time" allows you to set a time limit for displaying a warning if the PL Payments window isn’t refreshed. If left empty, no warning will be shown.
Reviewing & Managing Payments
Invoices Tab
- The Invoices tab displays a list of outstanding invoices. Each listing provides details such as Invoice No, Invoice Date, PL Account No, Total Amount owed, and if the amount has been suspended.
- Tick the invoices you want to process for payment in the Make Payment column. Use the Select/Deselect All button to select or deselect all invoices for payment. This action will tick all invoices that are not marked as suspended:
Suspended Invoices
- If an invoice is suspended, it will be indicated in the Suspended? column.
- Invoices may be suspended for various reasons, such as pending health and safety documentation or a system setting that requires invoices to be manually reviewed before processing.
- You can check or uncheck the Suspended? box directly on this screen.
- Using the Select All feature will not automatically select suspended invoices for payment.
- However, you can manually tick the Make Payment box for these invoices without changing their suspended status.
Invoice Shares Tab and Manual Payments
- The Invoice Shares tab provides a detailed breakdown of invoices that cover multiple developments or apportionments. While the Invoices tab displays the total invoice, the Invoice Shares tab shows how the invoice is divided among different areas.
- Part-Payment Option: This tab is useful for making partial payments. For instance, if you want to pay for services rendered in one development but delay payment for another due to unavailable funds, you can choose to pay only the relevant invoice shares.
- Payment Type: Make sure the Payment Type is set to Manual to enable paying individual invoice shares instead of the entire invoice.
- PL Account Selection: When using Manual payment, you must select an individual PL Account in the designated field.
- To pay an invoice partially, select Pay Invoice Share in the grid. The Share Amount To Pay column defaults to the outstanding share but you can amend it to the amount you wish to pay:
If the system options "Enable PL Payment Invoice Shares Row Colours" and "PL Payments Invoice Share Highlight Default" are turned on, two checkboxes appear in the Invoice Shares tab:
- Highlight All Charges to Selected Invoice
- Highlight All Charges to Selected Development
Ticking either option means that when you select a row in the grid, all related rows with charges from the same invoice or development will be highlighted:
Pre-list Tab
- Displays the payments you have selected in the Invoices and Invoice Shares tabs.
- Alternatively, click the Prelist Report button under the grid. This generates a report format of the information.
The system option "PL Prelist Only Show Selected To Pay" allows you to choose whether the Pre-list tab displays all invoices or only those marked with a check in the Make Payment? box. The Amount to Pay and Total to be Paid columns will update accordingly in both scenarios.
Summary Tab
- Displays a summary of the invoices and total amounts owed, aggregating the details provided in the other tabs.
Possible Duplicates Tab
- This tab helps verify potential data entry errors. It flags invoices entered for the same contractor, with the same amount, on the same date, allowing you to verify whether the entries are correct or duplicated.
- While the PL Transactions screen provides initial warnings for similar entries, this tab serves as an additional check to prevent duplicate payments:
Processing Payments
Prelist Report
- Once you've selected the invoices for payment, you're ready to proceed.
- Before finalising the payments, consider generating a Prelist Report from the options below the grid. Click the Prelist Report button. It displays a list of all pending payments to your contractors (PL Accounts).
Process Payments
- Click the Process Payments button to process all invoices marked in the Make Payment column.
- The Payment Date field defaults to today’s date, but you can change it in the drop-down.
- A progress bar displays. Upon completion, a pop-up message will detail batch numbers and the total amount processed. Click OK:
Payment Summary
- Click the Payment Summary button to review a detailed report of the transactions.
Additional Options
Bank Report
- If you selected payment type BACS or Cheque, you've likely made all payments from a single bank account. The Bank Report shows where to transfer the money into your clearing account from.
Post Nominals
- The Nominal Transaction Date field defaults to today's date, but you can change it in the drop-down.
- Click the Post Nominals button to ensure all bank transfers made within the system are posted to the nominal accounts.
- Once complete, a pop-up will provide a batch number.
Remit Print and Remit Email
Use the Remit Print and Remit Email buttons for printing and emailing remittances to your PL Account holders:
- Remit Print:
- Select your Payment Type and click Apply Filter:
- The report will display the remittances.
- To print them, click Print.
- To export them, select a format in the Export To drop-down and click Export.
- If they printed correctly, click Accept CHEQUE/Accept BACS (depending on what Payment Type was selected):
- A pop-up will ask if you want to mark the report as accepted. Click Yes in the Accept pop-up and Yes in the Continue Confirmation pop-up to confirm that the remittances printed successfully.
- Remit Email:
- Verify the recipient information (Contractor Name, Email), then click View Report to preview the email content:
- Once satisfied, click Accept. When all entries in the column display a green tick, a pop-up will confirm the successful completion of the process and the sending of all emails. Click OK:
Make sure each Purchase Ledger Account has an email address entered and is marked for BACS to enable email remittances.
You can define the email address from which PL BACS Remittance Emails are sent in the system option "Send Email Address for Remittances."
BACS Export
- After processing a BACS batch of payments, click the BACS Export button to export the current batch.
- This will take you to the Export Bank Transfers tab in the PL Global Actions menu.
- Select Export Single BACS batch.

Selecting the Process BACS Exports button will export all outstanding PL Payment bank transfers.
Selecting the Process Inter Company Exports button will allow users to transfer funds between separate Development and Purchase Ledger Bank accounts.
- Click Process to create a CSV file:
- A pop-up will confirm the file path where the CSV file has been generated.
- Locate this file using the file path information and send it to your bank.
- To perform this action for previous BACS payment batches, return to the PL Payments screen at any time, follow the same process and then enter the batch number on the BACS Export window to create the relevant CSV file.
The system option "Group BACS Export by PL Account" allows you to choose whether exported payments are grouped by PL account or listed separately for each individual invoice payment.
Reprint PL BACS/Cheque Reports
At the bottom of the screen, reprint reports using the Reprint PL BACS/Cheque Reports:
- Select the report in the drop-down menu.
- Click the Reprint icon to initiate printing.
- Select filter options on the left and click Apply Filter.
- Print or export the report:
Related Articles
Purchase Ledger - Reviewing Invoices and Payments in the Transaction Activity tab
This article is part of the Purchase Ledger section. Find all related articles here: Purchase Ledger Once you have posted an invoice for a PL account following the steps in Purchase Ledger Transactions - Posting a Purchase Invoice you will be able to ...Purchase Ledger - Creating a Purchase Ledger Account
This article is part of the Purchase Ledger section. Find all related articles here: Purchase Ledger A Purchase Ledger is where you store all your contractor information. To create a new Purchase Ledger (PL) account, select Purchase Ledger from the ...Purchase Ledger - Deleting or Suspending a Purchase Ledger Account
This article is part of the Purchase Ledger section. Find all related articles here: Purchase Ledger If you no longer want to use a contractor, you can delete or suspend their account to prevent any further jobs or invoices being raised. Deleting a ...Purchase Ledger Invoices Import
This article is part of the Imports section. Find all related articles here: Imports This guide walks you through using the PL Invoices Import tool to upload purchase ledger invoices for your PL accounts. Getting Started If your import has been ...Purchase Ledger Transactions - Posting a Purchase Invoice
This article is part of the Purchase Ledger section. Find all related articles here: Purchase Ledger Introduction This guide explains how to post an invoice from a Purchase Ledger (PL) Account into the Hold File. You can post: An invoice not linked ...