Proposed Invoices - Accepting, Amending or Deleting a Proposed Invoice

This article is part of the Proposed Invoices section.
Find all related articles here:
When you post contractor invoices from the In-Tray or Blockworx, they will appear in the Proposed Invoices tab for you to review and accept before they hit the Hold File.
The Proposed Invoices grid shows Submitted invoices by default. These are invoices that require review.
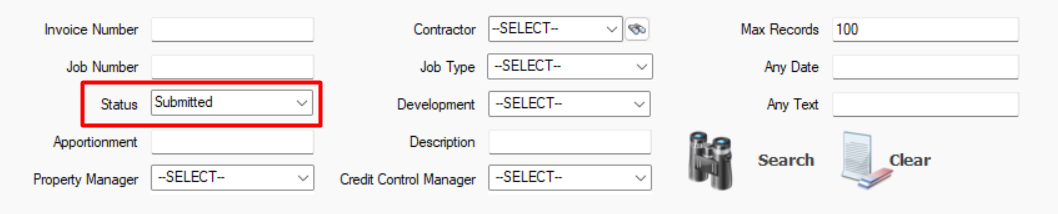
Once an invoice has been accepted, the status will change to Accepted. Deleted invoices are set to Obsolete. Use the Status dropdown to filter your results when searching for invoices.

Users will require the Proposed Invoice Master Tab Access permission to be able to access and use the Proposed Invoices tab.
See: Users - Setting Permissions for information on how to assign permissions.Accepting a Proposed Invoice
If you do not need to make any changes, you can accept invoices directly from the main Proposed Invoices grid.
- Click on an invoice in the grid to highlight it. This will display information about the invoice in the pin panel on the right of the screen.
- If you are happy with the information displayed, click the Accept button in the bottom action bar.
Users will need the "Accept Proposed Invoice From Master Tab" permission to access this button.
- This will open the Accept Proposed Invoice screen. You can edit the details on this screen, if required.

If the invoice is linked to a job, the instructions from the work order may appear in the Description. Make sure to remove these if you do not want them to appear on client invoices.
- When amending the Description, tap F5 on your keyboard to select a Standard Description.
- Click View Invoice in the bottom right corner if you want to view the original invoice from the contractor.
- You can split an invoice over several clients/apportionments for the same development. Click Add New Row to select additional details.
- Click
on the far right of each line to remove the row.
- The Grand Total will display in red until the totals match the original total of the invoice shown in the top pin panel.
- Once the amounts match, the totals display in blue.
- When you are ready to post to the Hold File, you can tick Auto Release so that the invoice will not need to be released in the Hold File before being processed to the Charge File.
The "Auto Release Proposed Invoice Hold Files" System Setting can be set to tick the Auto Release box by default. You will still be able to untick this box, if required.
- Click Post Invoice in the action bar at the bottom to post the invoice to the Hold File. It will also appear on the PL Account as an outstanding invoice.
- When you accept and post a proposed invoice linked to a job, you will also see a pop-up asking for confirmation to complete the job. Click Yes to proceed.
- This will open the Jobs screen at Stage 3. Follow the steps in Jobs Maintenance - Completing a Work Order to complete the job.
Amending a Proposed Invoice
Sometimes you may need to make changes to the information that has been posted from the In-Tray or Blockworx before you accept an invoice.
- Click on an invoice to highlight it in the grid.
- Double-click, or click Amend in the action bar at the bottom, to open the Proposed Invoice screen.
- Click Edit Details.
- Click Save in the top left corner when you have finished making amendments.
- If you don't want to save your changes, click Discard Changes in the action bar at the bottom.
- Once you have amended the details, click Accept Invoice. This will open the Accept Proposed Invoice screen.
- You can now follow the same steps as before to review and post your invoice through to the Hold File.
Deleting a Proposed Invoice
If an invoice is not required, you can mark it as Obsolete.
- Click on an invoice to highlight it in the grid.
- Double-click, or click Amend in the action bar at the bottom, to open the Proposed Invoice screen.
- Click Delete Invoice in the action bar at the bottom.
- Enter a reason for deletion on the Proposed Invoice Deletion screen.
- Click Delete Invoice.
- The invoice will now only be visible in the main Proposed Invoices tab if you select Obsolete in the Status dropdown.
Reinstating a deleted Proposed Invoice
If you delete an invoice in error, it can be easily reinstated.
- Find the invoice in the Proposed Invoices tab, making sure to set your Status filter to Obsolete.

Leaving the dropdown at --SELECT-- will capture all invoice statuses.

- Highlight the invoice in the grid, and click Restore in the action bar at the bottom.
- A pop-up will ask you to confirm you want to revert the invoice to Submitted status. Click OK to proceed.
- Click OK to dismiss the confirmation pop-up.
Related Articles
Proptimo Release Notes
In the table below you will find links to access copies of Proptimo's Release Notes. Version Release Date Click to View Notes Proptimo Core 2.93 5th February 2026 Customer Portal 3.3.49 5th February 2026 Proptimo 3.3.49 5th February 2026 Proptimo ...Proposed Invoices - Querying Invoices Submitted via Proptimo Contractor
This article is part of the Proposed Invoices section. Find all related articles here: Proposed Invoices If an invoice was submitted via Proptimo Contractor (formerly Blockworx), you can query it with the contractor if it is not correct. To do this: ...Working with Blockworx Contractors - Proposed Invoices
This article is part of the Working with Blockworx Contractors section. Find all related articles here: Working with Blockworx Contractors Contractors can submit their invoices through Blockworx. When they do, follow these steps: You’ll receive a ...In-Tray - Linking and Posting in the In-Tray
This article is part of the In-Tray section. Find all related articles here: In-Tray Once you have added a document to the In-Tray, you are ready to link it to the relevant record. Linking Files Follow the steps in In-Tray - Adding and Managing Files ...Proposed Invoices - Authorisation
This article is part of the Proposed Invoices section. Find all related articles here: Proposed Invoices If you do not see the Accept Invoice button when accepting an invoice, this means you you will need to request authorisation. Switching off the ...