Property Portal - Cases
 This article is part of the Property Portal section.
You can create cases individually or as part of a meeting. We’ll refer to these as individual cases and meeting cases.
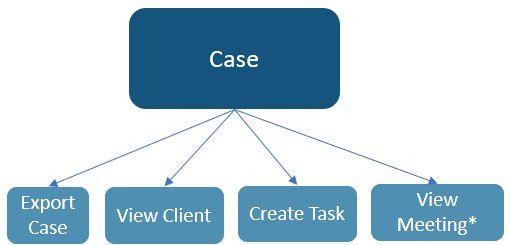
The diagram below shows the action buttons available within a case. View Meeting is only available in meeting cases:
Creating Cases
- To create an individual case:
- Hover over Cases.
- Click Open a case.
- Or click Cases, then the + sign on the right:
- To create a meeting case, open the meeting and click Create Case.
Once you begin creating a case, follow these steps:
- Add a Title for the case.
- Provide a Description or select a standard one from CPL by clicking the book icon on the left:
- Choose a Case Type.
- Choose a Case Status Type.
- Select an SLA Type.
- Assign the case to a User.
- The radio button defaults to Client.
- To raise the case for a CPL client, select one from the drop-down.
- For a non-CPL client, switch the radio button to Email Address, then enter the email and name.
- Click Create Case.

When logging cases, you can create internal-only cases by setting up a Case Type in Admin > Customisable Types > Case Types and leaving Show on portal unticked.:
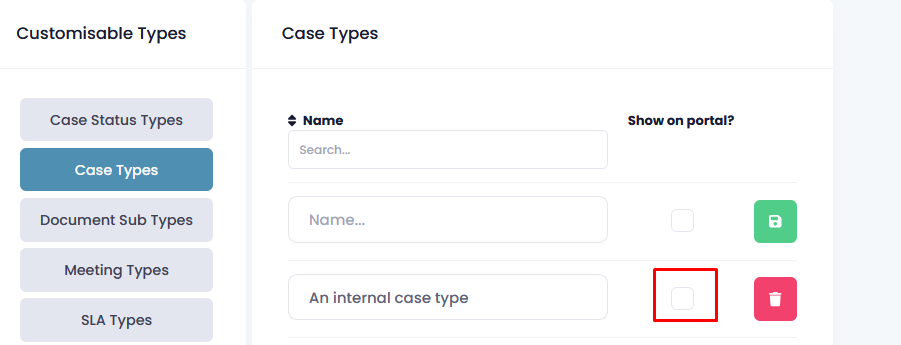
These cases will not appear in the client portal. However, comments are still emailed to clients by default, so to keep the case fully internal, ensure all comments are marked as Private and do not remove the private tick.
These cases will not appear in the client portal. However, comments are still emailed to clients by default, so to keep the case fully internal, ensure all comments are marked as Private and do not remove the private tick.
General Case Management
- To view all cases, go to the Cases menu.
- You will see:
- open and closed cases,
- cases assigned to you or other users,
- individual cases and meeting cases.
- Sort columns using the arrow icon.
- Hover over any column header to view the current sorting criteria:
- To view the details, click View Case next to the relevant case.
- Make any changes and click Save.
- Available actions:
- Export Case.
- View Client - opens the client account if the case is for a CPL client.
- Create New Task - adds a task, in addition to the default task.

The CPL window might not automatically come to the front. Click the CPL icon on your taskbar to bring it forward.
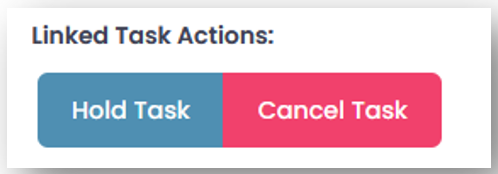
The Hold Task and Cancel Task options on the Details tab only affect the default task, not to any additional tasks added manually:
- Add comments in the Discussion section as outlined here.
- To close a case, change the Case Status Type to Closed (or another status set up as "closed" in the Admin area).
- View and manage the default task and any additional tasks on the Tasks tab.
Meeting Cases
- To view meeting cases:
- Open the relevant meeting.
- Go to the Cases tab.
- Click View Case.
- When working in a meeting case, click View Meeting to return to the meeting details:
Change History Tab
All changes to a Case are recorded on the Change History tab, including details of who made each change and when. Click on a column header to sort the list; click again to reverse the sort order:
Related Articles
Property Portal - Scheduling: My Tasks - Managing Tasks
This article is part of the Property Portal section. Find all related articles here: Property Portal You can create tasks individually or as part of a case or meeting. We'll call these individual tasks, case tasks and meeting tasks. The diagram below ...Property Portal - Comments
This article is part of the Property Portal section. Find all related articles here: Property Portal Introduction You can add comments to meetings, cases, jobs and estimates — but not to tasks. There are two types of comments: public and private. Use ...Property Portal - Scheduling: My Tasks - Creating Tasks
This article is part of the Property Portal section. Find all related articles here: Property Portal You can create tasks individually or as part of a case or meeting. We’ll refer to these as individual tasks, case tasks and meeting tasks. Creating ...Property Portal - Signing Up and the Dashboard
This article is part of the Property Portal section. Find all related articles here: Property Portal Introduction The Property Portal is a web-based application designed to help property managers and homeowners interact more easily. It allows you to ...Property Portal - Admin: Settings - Client Portal Options and Features
This article is part of the Property Portal section. Find all related articles here: Connect Available Settings You can control which features clients have access to in the Client Portal by configuring the Client Portal Settings page: To manage these ...