Warranties and Maintenance Contracts - Adding a Warranty

This article is part of the Warranties & Maintenance Contracts section.
Find all related articles here:
Adding a Warranty
To create a new Warranty or Maintenance Contract:
- Navigate to the Development tab and open the Development.
- Click the Warranties/Maintenance tab on the Development to open the Warranties/Maintenance screen.
- Click the Add button in the left action bar.
- This will open the New Warranty Maintenance Contract window for that Development.
- Enter a Description.
- In the PL Account Number field select the contractor who the warranty or maintenance contract is with.
- Select from the drop-down or click the three dots to search.
- You can't add a new contractor here so you would need to do this in the Purchase Ledger tab first.
- Job Type will be automatically set when you select a contractor, but you can edit this.
- Select a Telephone Number. If there isn't one in the dropdown, make sure it is set up on the PL account.
- Set the Effective Date as the date of the start of the maintenance contract or warranty.
- Set the Expiry Date as the date the maintenance contract or warranty is due to expire.
- The Expiry Days field will update as you add an Expiry Date. You could leave the Expiry Date blank and set a number of days instead.
- Set the Retender Date as the date you will start arranging for a new contract. Give yourself enough time to set up a new one before the current one expires.
- See the Other Dates section below for more information on this button.
- Enter any Notes you need to keep as a reminder.
- Click Save and Close.
- A pop-up will confirm that the maintenance contract or warranty has been created.
Adding Other Contract Dates
- When you click OK to dismiss the pop-up, a second pop-up will ask if you want to add Other Contract Dates.
- Click Yes to open the Other Dates window.
- If you click No, you can go back and add dates at a later stage by clicking the Other Dates icon.
- Here you can enter any other important dates related to the maintenance contract or warranty. For example, you may need the contractor to carry out additional Risk Assessments or inspections.
- Double click in the Date and Description fields to add text.
- Once you have entered your dates, click Save and Close.
- You can come back to add additional dates at any point.
Once you have created a new Warranty or Maintenance Contract this will be displayed in the Warranties/Maintenance tab on the Development.
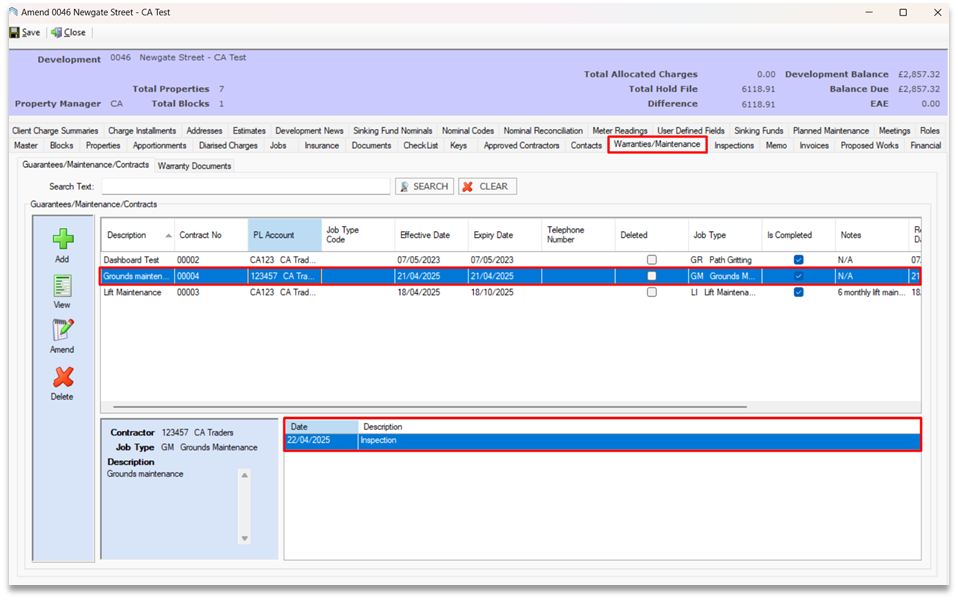
Anything you have entered against Other Dates will be displayed in the bottom grid.
Related Articles
Warranties and Maintenance Contracts - Adding Documents
This article is part of the Warranties and Maintenance Contracts section. Find all related articles here: Warranties and Maintenance Contracts Once you have added a new warranty or maintenance contract to a Development, you can add any documentation ...Warranties and Maintenance Contracts - Creating a Job or Estimate
This article is part of the Warranties and Maintenance Contracts section. Find all related articles here: Warranties and Maintenance Contracts Once you have added all your dates, you can create a Job or an Estimate directly from the ...Warranties and Maintenance Contracts - Reporting
This article is part of the Warranties and Maintenance Contracts section. Find all related articles here: Warranties and Maintenance Contracts Along with Notifications and Dashboard Cards, there are several ways to keep track of warranties using ...Warranties and Maintenance Contracts - Dashboard Cards and Notifications
This article is part of the Warranties and Maintenance Contracts section. Find all related articles here: Warranties and Maintenance Contracts You can manage and keep track of warranties and maintenance contracts from the Dashboard, and by enabling ...Warranties and Maintenance Contracts - Billing Clients via Diarised Charges
This article is part of the Warranties & Maintenance Contracts section. Find all related articles here: Warranties & Maintenance Contracts Once you have created the warranty, you can link it to a Diarised Charge to bill your clients and pay the ...