Developments - Development Wizard - Adding Properties

This article is part of the Development Wizard section.
Find all related articles here:
To do this:
- You will already have the Wizard open to Step 3 after completing Step 2.
- Select the block you want to add properties to from the Block dropdown.
- Click Wizard in the action bar on the left of the screen.
- This will open the Wizard: Add Properties to Development window.
Property Details
- In the Property Details section at the top, add information about the property:
- Property Number - This auto populates with the next available number.
- Property Address & Property Postcode - Amend the Development address to the specific property details.
- Tick Client Address same as Property Address? to copy the address to the Client Account Information section.
- If the client lives at a separate address, you can add it later.
- Effective Date of Management - If you have taken on a newly built development, you may not begin to manage all properties on the same date you have already entered for the development. They may come on board at different times and would therefore have different dates for when you start to manage them.
- You can enter an estimated date here, and then come back and edit it when you have a confirmed date. Tick Actual if the date has been confirmed.
- Ignore the Advanced Charge field.
- Unit Type - This may differ from the selection made at Development level.
- Block Number - Confirm which block the property will be added to.
- A pop-up will appear asking you to confirm if the default values you entered for that block should be added to the property.
- Click Yes to proceed. This will populate the Float Payable, Management Fee and Developer Fee fields.
- If you click No, you can enter individual amounts for the property instead.
- SqFt - If relevant, you can choose to add the square footage of each property.
- Apportionments can be worked out based on square footage if the title deeds use this method. This is mainly on older title deeds.
- Job Warning Limit - Tick to display a warning when a job is created with a target amount that exceeds the amount entered here.
- EAE - Optional. Estimated Annual Expenditure is useful when calculating budgets or setting clients up to pay by direct debit. The system will be able to calculate this itself once charges have been applied to the property, but you may wish to enter an estimate when you first add the property.
Client Account Information
- In the Client Account Information section in the middle, enter information about the client in the property.
- Client Name & Colloquial Name - Enter the client's full name, and the name they prefer to be known by.
- Account Type - Choose from Client or Developer.
Make sure you select the correct type here, as Developer accounts are excluded from some fees and processes later on.
- Payment Type - This is the default payment method that will be pre-selected on the payments screen. You can change this when taking a payment.
- If you select Standing Order you will be prompted to add Bank Details on this screen.
- If you select BACS or Direct Debit you will also need to enter bank details on the Direct Debits tab at a later stage.
- Green Fee (Ex. VAT) - If you want to charge this client for receiving paper communication and invoices, add an amount here.
- Non DD Fee (Ex. VAT) - If you want to charge this client for not paying by Direct Debit, add an amount here.
- Alternative Account Number - Optional. Set an alternative account number.
- The Client Address & Postcode will already be populated if you ticked that it was the same as the Property Address. If not, you can add different address details here.
- Entry Date - Enter the date the client took ownership of the property, or the date you took over management with the client already in place.
- Ignore the Exit Date field.
- Garage Space - Optional. Record details of any private or shared vehicle storage areas that are subject to factoring services and charges.
- Insurance Date of Advisement - Optional. Record the date on which the property owners were notified about the building insurance policy details.
- Note of Interest - Enter any useful information about the client here.
Tick boxes
- Similar to the Step 1 screen, there are a set of check boxes at the foot of this section which determine how the system will act when dealing with this client.
- Always Print Invoices - Tick to always print invoices for this client, even if they are ticked to receive invoices by email.
- Always Print Documents - Tick to always print documents for this client, even if they are ticked to receive documents by email
- Exclude Apportion Fees - Tick to exclude the client from Sales Apportion fees being applied.
- Exclude Management Fees - Tick to exclude the client from Management Fee charges.
- Exclude Annual Calculations - Tick to exclude the client from Annual Direct Debit calculations. You would choose this if you have a payment plan in place and you do not want the system to recalculate the Direct Debit at year-end.
- Resident's Association - Tick to show if the client is a member of the Resident's Association.
- Pays in Advance - Tick if the client has opted to pay in advance.
- Opt Out Paperless - Tick to opt the client out of paperless billing, and they can be filtered out of receiving any generic letters you send asking clients to switch to email.
- Opt In Marketing - Tick to show the client is happy to receive marketing information.
- Internal Client - Tick to identify the client as an internal client. This will allow you to exclude them from certain fees and processes later on.
- Exclude Paper Fees - Tick to exclude the client from paper fees and green fees.
- Annual Insurance Billing - Tick if the client wants to avoid paying interest and pay their whole premium up front.
Once you have entered all of your property and client information, click Wizard: Save Property and Create New at the top of the screen.

Adding a Telephone Number
- A pop-up will ask you if you want to add a telephone number for the client. Click Yes to open the Client Telephone screen.
- Click into the grid under the Telephone column and type the first number.
- Next, click into the Description cell in the grid and you can add a description for this number e.g. Home, Work
- If this is the main telephone number for this client then you can click to mark this as the Default.
- Once you have added all numbers for the client, click Save & Close.
Adding an Email Address
- A pop-up will ask you if you want to add an email address for the client. Click Yes to open the Client Email window.
- Click in the grid under the Email column and type their email address.
- Click under the Description column to add a relevant description for this email address e.g. Personal, Work
- You must mark at least one email address as a Default address for this client.
- If you tick For Documents, documents will be sent by email to this address.
- If you tick For Invoices, invoices will be sent by email to this address.
- Once you have added all email addresses for the client, click Save & Close.
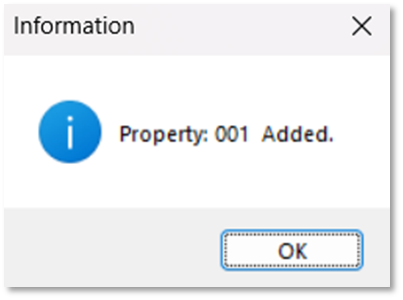
After you have added telephone numbers and email addresses, a final pop-up will confirm that the property has been added to the block.
The Wizard will then move on to the next property, but retain all information from the previous property in order to save you time in filling in common details.

Ensure you review and edit all fields so you do not retain any client details for the previous property.
When you have finished adding properties, click Close in the top left corner.
You are now ready to set the development to live.
Make sure to go back and add Bank Details on each client's Direct Debits tab if you have selected Direct Debit as the Payment Type.
Related Articles
Developments - Development Wizard - Adding Blocks
This article is part of the Development Wizard section. Find all related articles here: Development Wizard Once you have created a new development, you are ready to add blocks. Each development must have at least one block. Blocks are used to ...Developments - Development Wizard - Creating a Development
This article is part of the Development Wizard section. Find all related articles here: Development Wizard This section covers how to add new Developments to the system using the Development Wizard. You can also click the Add button on the ...Developments - Setting a Development to Live
This article is part of the Developments section. Find all related articles here: Developments Once you have completed the Development Wizard, or created a development manually, you must set the development to live. To do this: Navigate to the ...Developments - Development Roles
This article is part of the Developments section. Find all related articles here: Developments The Roles tab on each development allows you to create other roles for a development, in addition to the Property Manager and Credit Control Manager. You ...Developments - Development News
This article is part of the Developments section. Find all related articles here: Developments The Development News tab on each development is where you can add, edit and delete Development News posts which appear on the Residents Portal. Users will ...