Connect - Admin: Client Portal
 This article is part of the Connect section.
Find all related articles here:
The New Client Portal can be customised in Connect. You can configure the following aspects to match your organisation’s branding and settings:
Company Branding
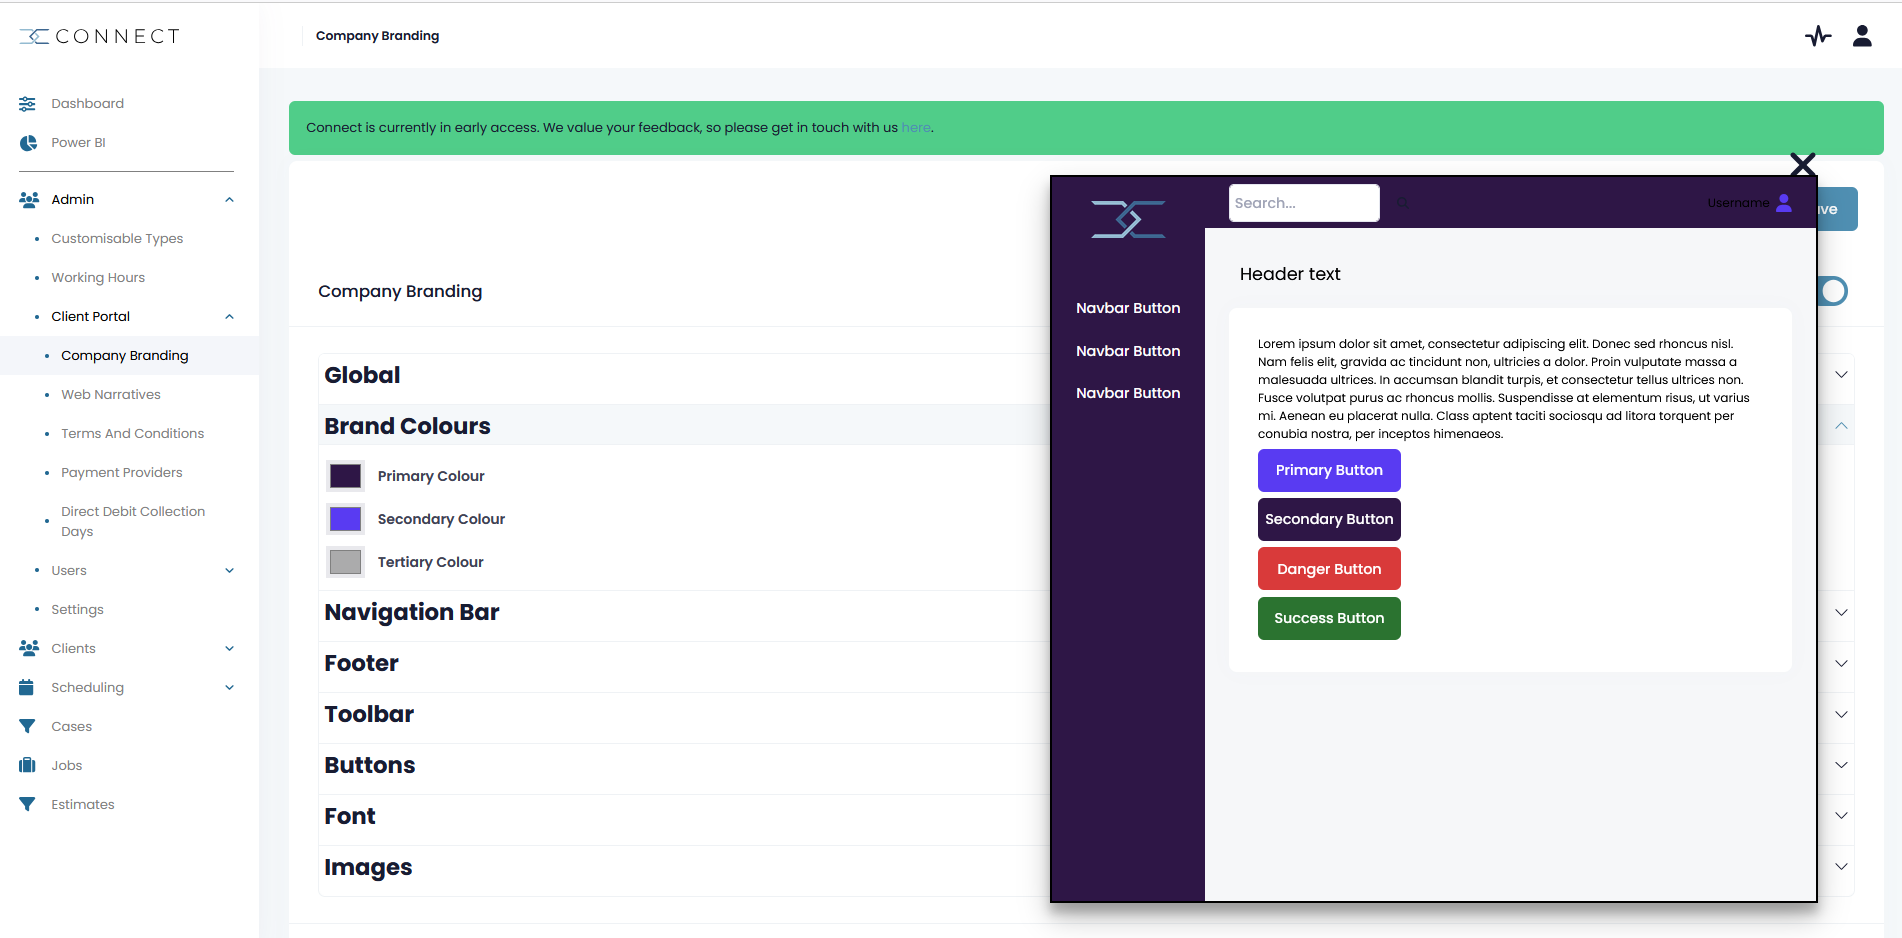
To customise your Client Portal branding, go to Admin > Client Portal > Company Branding from the navigation menu.
On the Company Branding page, you can expand the available sections to configure the following:

Click the colour box to choose a new colour.
- Global Name – Set your company’s display name.
- Brand Colours – Define your primary, secondary and tertiary brand colours.
- Navigation Bar – Customise the background, text, button, button text, and icon colours.
- Footer – Adjust the background and text colours, as well as button and button text colours.
- Toolbar – Set background, text and button colours for the toolbar.
- Buttons – Define colours and text colours for primary, secondary, success and danger button states.
- Font – Choose fonts and colours for body and headers. You can also upload custom font files.
- Images – Upload your company logo, favicon or custom CSS.
After saving your branding preferences, you can see how they will appear in the Client Portal by clicking the Open Preview button at the top of the screen:

If you want to turn off custom branding, toggle the Generate Style Sheet option to Off. The Client Portal will then revert to CPL’s default branding:
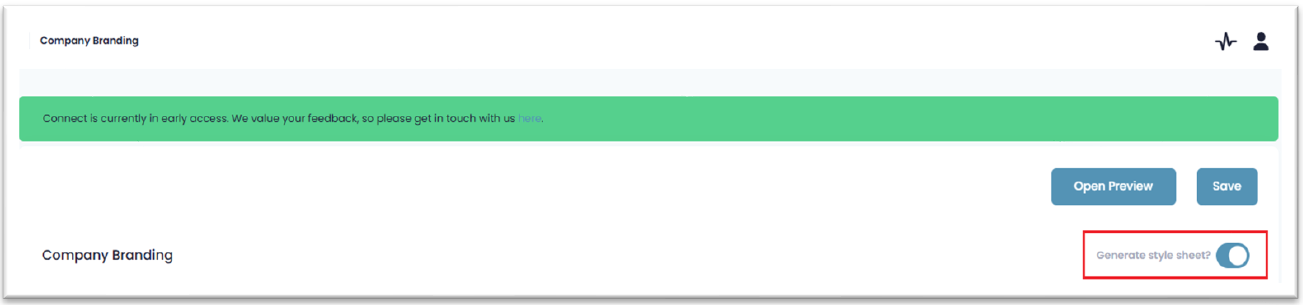
If you want to turn off custom branding, toggle the Generate Style Sheet option to Off. The Client Portal will then revert to CPL’s default branding:
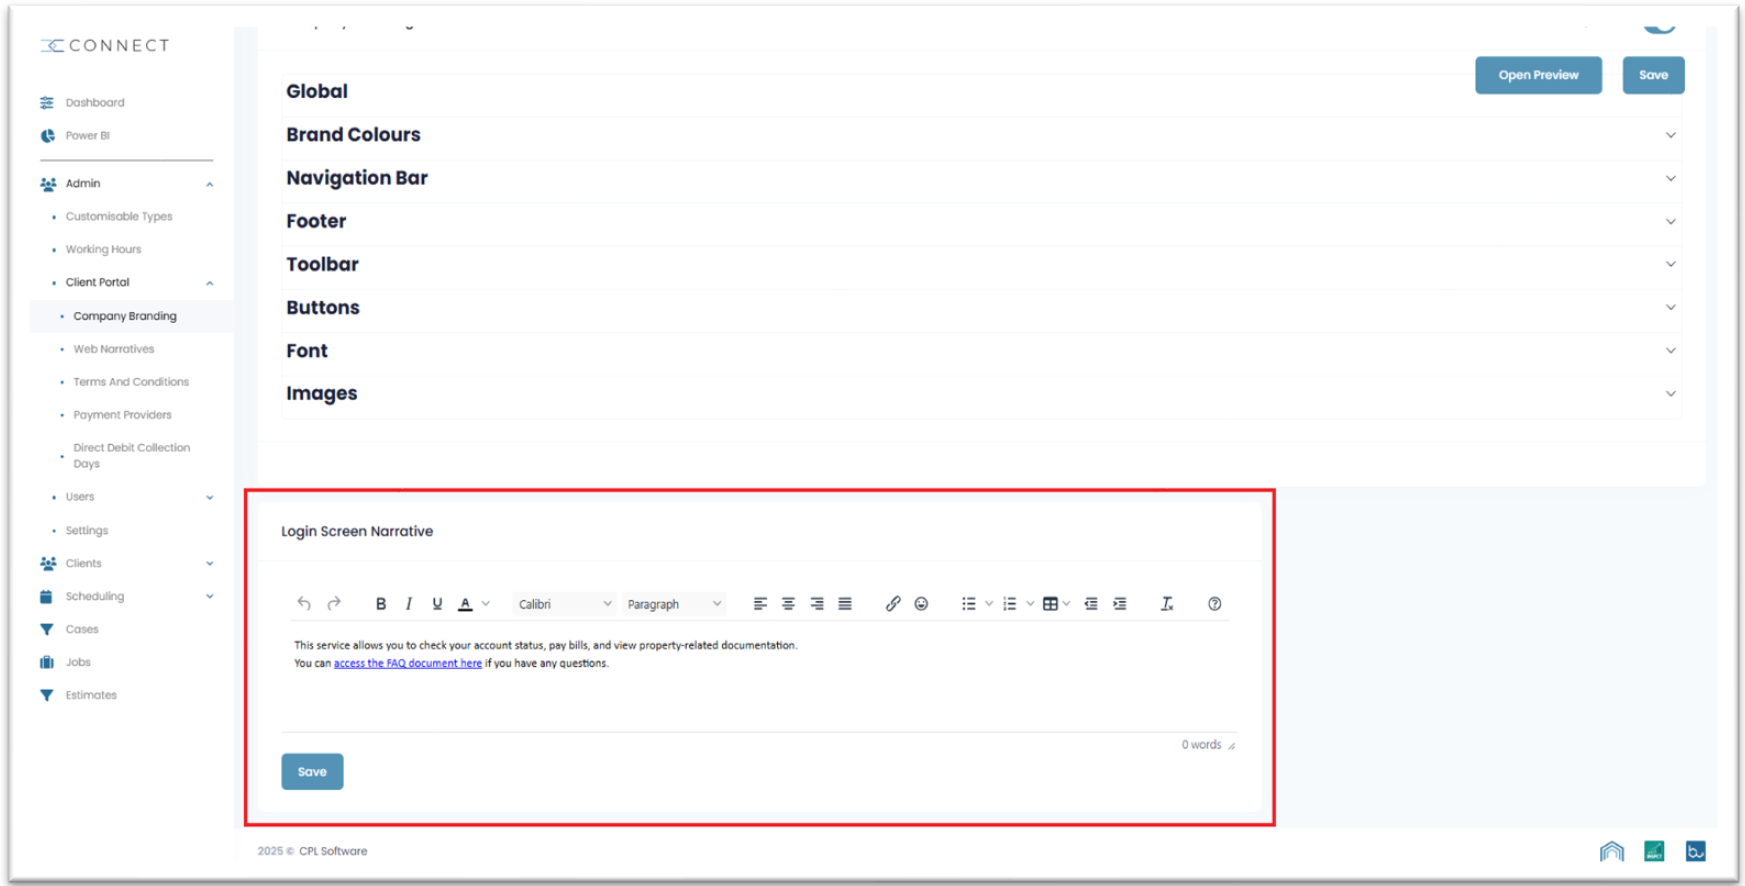
Login Screen Narrative
You can also customise the login screen by adding a Login Screen Narrative. This allows you to explain the purpose of the portal and include links to helpful documentation. Use the text editor to format your message, add links and structure the content as needed.
When you're finished, click Save to apply your changes:
Once saved, this message will be visible to all clients on the Client Portal login page:
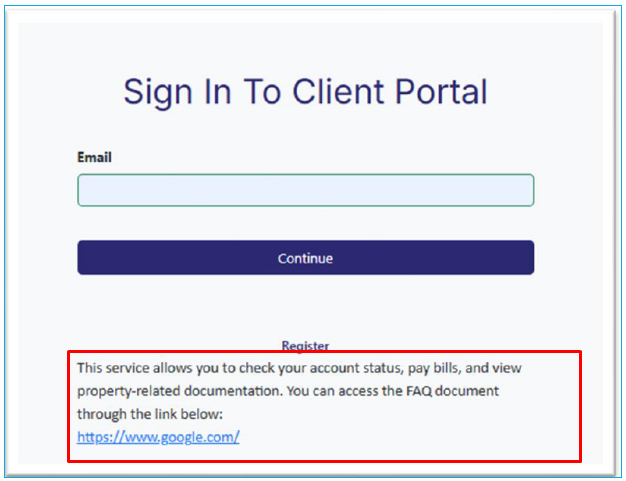
You can use this space to share helpful information such as:
- What the Portal is for.
- Links to FAQs or support resources.
Web Narratives
You can add a custom message to the top of each main navigation screen in the Client Portal, to explain the purpose of the page or provide useful context to clients.
To add a web narrative:
- Go to Admin > Client Portal > Web Narratives in the navigation menu.
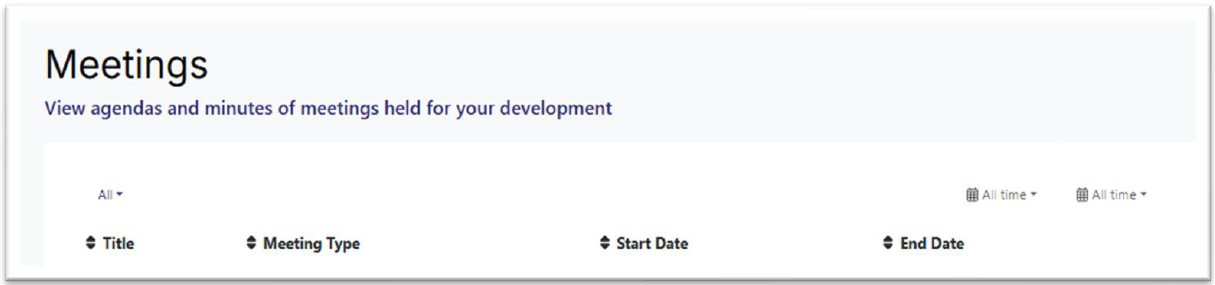
- On the Web Narratives page, select the screen you'd like to customise (e.g. Meetings).
- A text box will appear where you can enter your custom message.
- Click Save:
Once saved, the message will appear at the top of the corresponding screen in the Client Portal:
Terms And Conditions
You can upload Terms and Conditions for clients' use of the Client Portal through Connect.
Clients will be prompted to review and accept the Terms and Conditions when they first log in, and must accept them to continue using the portal.
To customise your Terms and Conditions:
- Go to Admin > Client Portal > Terms and Conditions in the navigation menu.
- This opens an editor where you can add or edit the text:
Linking to Online Terms and Conditions
If your Terms and Conditions are hosted on an external website, you can link to them instead:
- Click the link icon in the editor toolbar:
- In the pop-up window, enter:
- The URL of your hosted terms.
- The display text (what users will see).
- An optional title.
- Choose whether the link should open in the same window or a new window:
- Click Save.
Once saved, clients will be prompted to review and accept the Terms and Conditions when they log in to the Client Portal.
Payment Providers
You can add payment providers in Connect to allow clients to make payments directly through the Client Portal.
Connecting GoCardless
To add a GoCardless account:
- Go to Admin > Client Portal > Payment Providers.
- Click the Connect GoCardless button.
- A new browser tab will open, hosted by GoCardless.
- From there, either log in to an existing GoCardless account or register a new one:
Once connected:
- The GoCardless email address and payment description will appear in Connect.
- The service will display as enabled.
- You can disable payment collection using the Enabled slider.
- To remove the integration completely, click the bin icon:
Connecting Blink

If you'd like to integrate Blink as your payment provider, contact CPL. We will complete the setup for you.
Once CPL has set up the Blink integration for your account:
- Go to Admin > Client Portal > Payment Providers and click Blink.
- You’ll be able to view the set-up status:
- Once setup is complete, you can update the Payment Description.
- Use the Enabled slider to toggle payment collection on or off:
Direct Debit Collection Days
If GoCardless is enabled and clients can set up Direct Debit payments via the Client Portal, you can control the available collection dates through the Direct Debit Collection Days setting.
To configure these:
- Go to Admin > Client Portal > Direct Debit Collection Days.
- By default, clients can choose any day between the 1st and 28th of the month:
Restricting Collection Days
If you'd like to offer only specific dates:
- Select Custom days:
- Use the calendar to choose which dates clients can select.
- You can:
- Click individual dates to select or deselect them:
- Use the clear calendar icon to deselect all days:
- Use the populate calendar icon to reselect all days:
- Click Save to apply your changes.
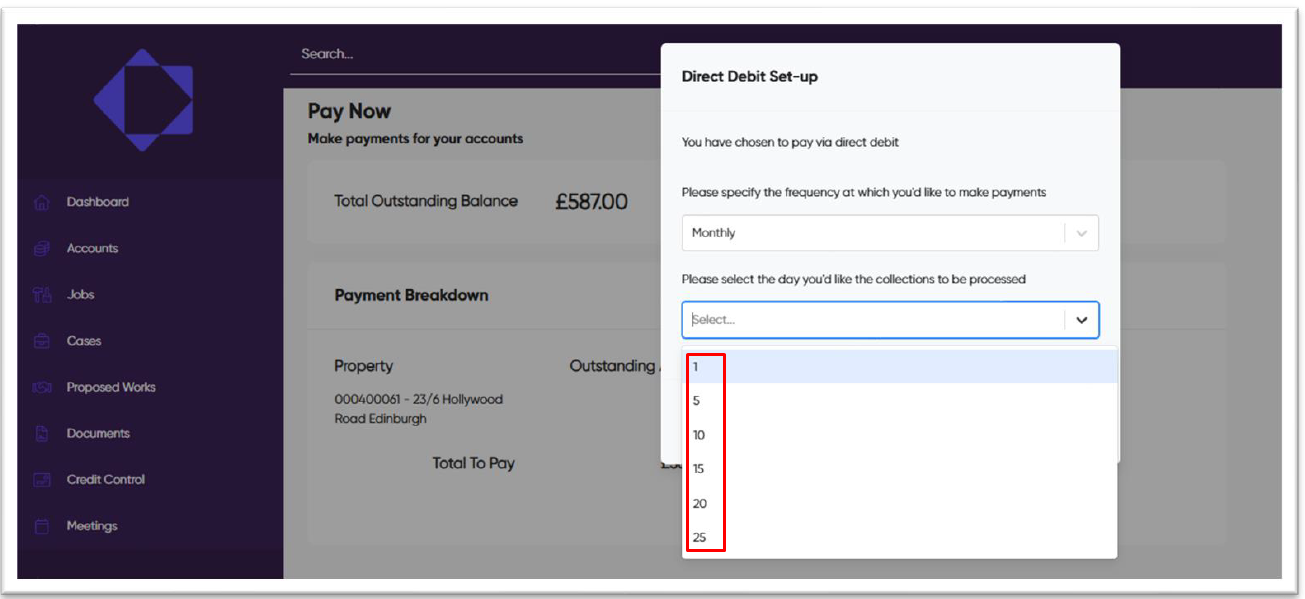
Once saved, only the selected collection dates will appear in the Direct Debit Set-up section of the Client Portal when clients choose to pay by direct debit:
Related Articles
Connect - Admin: Dropdown Types
This article is part of the Connect section. Find all related articles here: Connect To add and manage SLA types for cases, documents and meetings: Go to the Admin menu > Customisable Types. Click on a type under Customisable Types (e.g. Case Status ...Connect - Admin: Users, User Groups and Permissions
This article is part of the Connect section. Find all related articles here: Connect In the Admin menu > Users submenu, you can: create and manage users, create and manage user groups, assign and unassign permissions. Use the three options here: ...Connect - Admin: Working Hours
This article is part of the Connect section. Find all related articles here: Connect Go to the Working Hours section in the Admin menu to set your standard hours and any exceptions. Standard Working Hours Click the pencil icon under Standard Working ...Sending Client Notices
This article is part of the Client Notices section. Find all related articles here: Client Notices Once your notice type has been Accepted and your status has changed, it is time to send out your reminder letters. Sending Client Notices There are 2 ...Connect - Signing Up and the Dashboard
This article is part of the Connect section. Find all related articles here: Connect Introduction Connect is a web-based application designed to help property managers and homeowners interact more easily. It allows you to schedule meetings, manage ...